Connecting your laptop to a hotspot isn’t much different than connecting your laptop to your home network. Often you are using the same system dialog boxes and settings. Some differences exist, however, as well as some hidden concerns that you need to know about.
To begin with, your computer needs a wireless NIC to connect to a hotspot. In most instances, that means that either you have the capability built into your notebook using a preconfigured package such as Intel’s Centrino brand, or you add a wireless NIC in the form of a PC Card (PCMCIA or mini-PCI).
The trick is to have the right wireless technology to connect to the hotspot. Most of the current crop of notebooks are 802.11b devices, and more are being sold with dual protocol 802.11b/g added to them.
You can’t count on being able to connect to most hotspots with either 802.11a or 802.11g (although g is much more likely), but you can count on being able to connect to a hotspot by having an 802.11b capability.
It’s just that 802.11b has been around the longest, and that the second or third generation of access points with dual mode and tri-mode access points are just starting to replace the first generation.
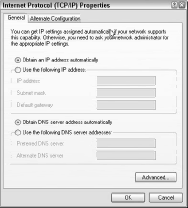
Your network adapter should be set to “Obtain an IP Address automatically” and “Obtain DNS server address automatically.” If you are a beginning user you can run the Network Connection Wizard in XP to specify a new connection. More advanced users can set these connection properties using the following procedure:
- Select Network Properties from the Control Panel and open the Network Connections dialog box. If you right-click Network Neighborhood and select the Properties command, you get to the same place.
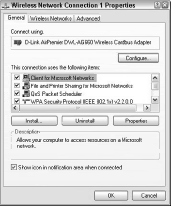
- Right-click the wireless connection, and select Properties to view the Wireless Network Connection Properties dialog box. We recommend that you enable the “Show icon in notification area when connected” checkbox because it makes it easier to diagnose your wireless connection’s condition.
- Scroll down to the Internet Protocol (TCP/IP) property and select it; then click the Properties button.
- Select “Obtain an IP address automatically” and “Obtain DNS server address automatically.”
- Click the OK button twice to accept the setting.
You’ll know you were successful in establishing a connection if you see an icon with two connected computers in the Status area of the taskbar.
Connecting to a Hotspot Using XP Wireless Client
Here are some instructions for connecting using the wireless client adapter with Windows XP:
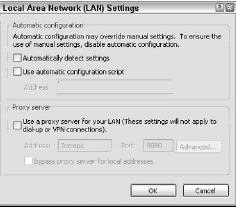
- Disable your proxy server. From Microsoft Internet Explorer, select Tools>Internet Options; click Connections, click LAN Settings, and disable the proxy server there.
- With your wireless connection set for DHCP, and automatic DNS assignment enabled (which you did in the previous section), right-click the icon in the Status area of your taskbar and select Enable if your connection is disabled.
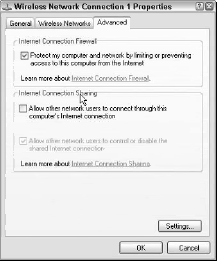
- Turn on your firewall. If you are using Microsoft’s personal firewall, enable that feature by checking the box on the wireless connection’s Properties dialog box, at the top of the Advanced tab.
- Right-click the icon for the wireless connection in the Status area of the taskbar and select View Available Wireless Networks.
- In the Wireless Network Connection dialog box, find the name (SSID) of the hotspot’s network and double-click the name.
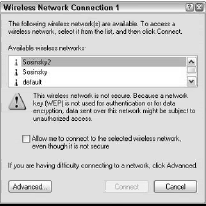
- For networks that don’t have encryption enabled, the Connect button is disabled. Click the checkbox marked “Allow me to connect to the selected wireless network even though it is not secure” and click the Connect button.
For Windows 2000, a wireless connection isn’t part of the operating system, which makes setting up a wireless connection a little more problematic, but no more complex than Windows XP. Your wireless PC Card should offer a connection client for Windows 2000 as part of its setup routine.
If that is the case, you can either start the software in a control panel or by accessing the software using an icon in the Status area. Most wireless connection software for Windows 2000 lets you set up a network profile and select not only the wireless network, but also settings and which card to connect as well.
