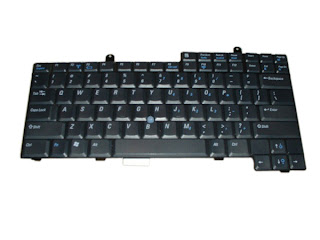
There are many reasons a laptop keyboard might become defective and require replacement. Whether it is from spilling a cup of coffee or overuse from writing a long novel or two, laptop keyboards usually do not last forever. If you take your laptop to a repair shop for a keyboard replacement, you should expect to pay a hefty premium to have the work done. On the other hand, if you are handy with a few basic hand tools, you can replace your laptop's keyboard yourself and save a lot of money.
1). Power off the laptop. Disconnect the AC adapter from the computer. Unplug any other cables or peripherals from the notebook. Close the laptop LCD screen.
2). Turn the laptop over so that it is upside down. Rotate the laptop until the battery on the bottom of the unit faces you. Slide the battery lock to the left and remove the battery from the laptop. Turn the laptop back over.
3). Open the LCD display screen on the laptop as far as it will go. The laptop display and base should be almost flat after opening the screen all the way.
4). Locate the keyboard edge cover or hinge cover just above the function keys on the top row of the keyboard. Position the awl at one end of the cover and insert it into the space between the bottom of the cover and the top row on the keyboard. Gently pry up the cover with the awl while working your way from one side of the laptop to the other. Gently lift the keyboard edge cover or hinge cover out of the laptop and set it aside.
5). Use the Phillips screwdriver to remove the keyboard retaining screws in the space from which you removed the edge or hinge cover. On most laptops, there are usually two to four screws that secure the keyboard. Set the screws aside in a safe place.
6). Use the awl or flathead screwdriver to lift up the top edge of the keyboard. Gently lift the top of the keyboard toward you until you can access the ribbon cable that connects the keyboard to the laptop motherboard.
7). Disconnect the ribbon cable from the motherboard. Set the old keyboard aside.
8). Insert the new keyboard into the laptop and connect the ribbon cable to the motherboard. Carefully align the screw holes on the top edge of the keyboard with those at the base of the laptop screen where you removed the edge or hinge cover.
9). Reinsert the retaining screws you removed earlier and tighten them with the Phillips screwdriver.
10). Align the keyboard edge cover or hinge cover and snap it back into place. Close the LCD screen and turn the laptop over. Insert the battery back into its slot and ensure the lock snaps shut.
11). Reconnect the AC adapter and other peripherals. Power on the laptop and use it as you normally would.
