If you're one of those users who like an extremely 'vanilla' installation of OS X, you may want to rid your drive of all extra Hackintosh-related files. The following method will lead you through installing all of these files to your EFI partition.
NOTE: This is entirely optional, and will not give you any benefits beyond cleaning the root of your install. Also, each time you want to make changes, you'll have to mount your EFI partition through the Terminal. If you're uncomfortable using the Terminal, do not proceed.
STEP 1: BEFORE YOU BEGIN
Please be aware that you'll be deleting your bootloader, rendering your drive unbootable without the new EFI partition. Make sure to back up your data, and if possible create an emergency Boot CD or USB drive. If you used the Boot CD method, you can always boot using the tonymacx86-P55BootCD.iso. Alternately, you can create a custom bootable Chameleon USB Drive.
For the purposes of this guide, I recommend unplugging all drives except your Snow Leopard installation hard drive and rebooting. This will minimize any problems with disk number and partition number. I will use disk0 by default in this guide. To make sure your disk is identified as disk0:
- Open /Utilities/Terminal
- Type diskutil list
- Compare your results with the following picture. If yours looks similar, and your root is disk0, you're ready to begin.
- Open Applications/Utilities/Terminal
- Type: sudo -s
- Type: newfs_hfs -v EFI /dev/disk0s1
- Type: mkdir /Volumes/EFI
- Type: mount_hfs /dev/disk0s1 /Volumes/EFI
STEP 3: INSTALL CHAMELEON TO EFI PARTITION
Because Chameleon will not be on your Snow Leopard partition anymore, you must re-install it to the EFI partition.
- Download any Chameleon binary source (For this example: Chameleon-2.0-RC4-r684-bin).
- Unzip the folder and place it on the desktop as shown in the picture.
- Open Applications/Utilities/Terminal
- Type: diskutil list
- Locate your EFI partition. It will be under IDENTIFIER. Be sure to use the correct one. (For this example: disk0s1)
- Type: cd
- Click and drag the Chameleon folder to Terminal, creating a path to it. This is a cool trick that you can use instead of typing the whole path. The command will become: cd /Users/****/Desktop/Chameleon-2.0-RC4-r684-bin
- Type: cd /i386
- Type: sudo fdisk -f boot0 -u -y /dev/rdisk0
- Type: sudo dd if=boot1h of=/dev/rdisk0s1
- Type: sudo cp boot /Volumes/EFI/
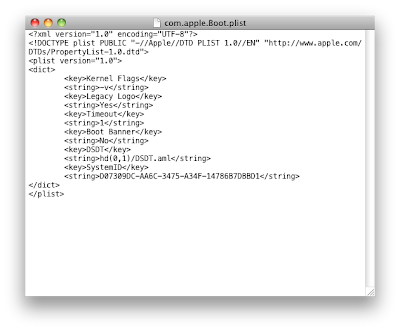
In order for your DSDT to be recognized, you must add a line to your com.apple.boot.plist in order for Chameleon to locate it on the EFI partition.
- Open /Extra/com.apple.Boot.plist in TextEdit or Property List Editor.
- Add the DSDT=hd(0,1)/DSDT.aml flag to your as seen in the pictures below.
- Save com.apple.boot.plist
- Download and run ShowAllFiles.
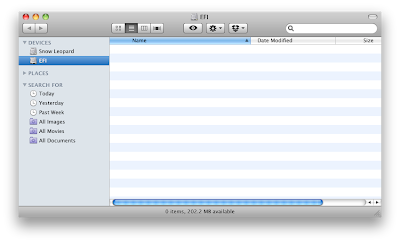
- Click and drag your DSDT.aml and /Extra folder from Snow Leopard to EFI.
- Make sure EFI looks similar to the one in the pictures below.
- Delete DSDT.aml, boot, and /Extra folder from Snow Leopard .

STEP 5: SET THE EFI PARTITION AS ACTIVE
You now have to set the EFI partition so that your computer boots from it first.
- Open Applications/Utilities/Terminal
- Type sudo -s
- Enter your password.
- Type fdisk -e /dev/rdisk0
- Type p
- Type f 1
- Type w
- Type y
- Close and re-open Terminal
- Type: sudo -s
- Enter your password.
- Type: umount -f /Volumes/EFI
- Type: rm -rf /Volumes/EFI
- Type: fsck_hfs /dev/disk0s1
- Close Terminal and reboot.
-tonymacx86
PS: The EFI partition will not automatically mount as other partitions do at boot time. If you ever need to change/update files in your new EFI...
- Open Applications/Utilities/Terminal
- Type mkdir /Volumes/EFI
- Type sudo mount_hfs /dev/disk0s1 /Volumes/EFI
EDIT: You can also use this script - EFI Mounter. Special thanks to SirReal for posting this- it's a nice little App you can stick in your Applications folder to mount/unmount your EFI partition.


