Showing posts with label MultiBeast. Show all posts

CustomBeast Now Available for NVIDIA 4xx Graphics Cards + USB 3.0 Support

CustomBeast is now available for NVIDIA 4xx graphics cards!  Supported specs now include any Gigabyte H55, P55, or X58 motherboard with any NVIDIA graphics card. 

In other news we have made some changes to CustomBeast.  During our testing we have found that the MacPro3,1 smbios.plist provides the best performance.  Because of this, we are removing the option for System Identification.  As an added bonus, we will now be including USB 3.0 drivers for supported motherboards.


-tonymacx86 & MacMan

For discussions on this and other topics, register today at tonymacx86.com!

New Unified Realtek Onboard Audio Solution: ALC8xxHDA


Introducing MacMan's ALC8xxHDA.kext, a single combined LegacyHDA replacement for Realtek ALC888, ALC887/888b, ALC889, ALC885/889a, and ALC892 high-definition audio codecs.  In order to initiate audio, this driver must be combined with a DSDT from the DSDT Database or HDAEnabler.  For any codecs other than the native ALC885/889a, AppleHDA Rollback must also be used.  All options now available in the latest MultiBeast.

To update from an existing MultiBeast LegacyHDA + AppleHDA rollback:
  1. Delete LegacyHDA from /Extra/Extenisons
  2. Open MultiBeast
  3. Select ALC8xxHDA + AppleHDA Rollback + System Utilities
  4. Reboot
To update from an existing MultiBeast VoodooHDA:
  1. Delete VoodooHDA from System/Library/Extensions.
  2. Open MultiBeast
  3. Select ALC8xxHDA + AppleHDA Rollback + System Utilities
  4. Reboot
Realtek ALC888, ALC887/888b, ALC889, ALC885/889a support:
OUTPUTS: Analog Front Headphone/Green Line-out, Orange Line-out, Grey Line-out, Digital SPDIF-OUT
INPUTS: Analog Pink Microphone, Blue Line-in, Digital SPDIF-IN
Realtek ALC892 support:
OUTPUTS: Analog Front Headphone/Green Line-out, Digital SPDIF-OUT
INPUTS: Analog Pink Microphone, Blue Line-in, Digital SPDIF-IN
Please report your results with this new method in the forum.  Special thanks to complx for the ALC8xxHDA logo.  Enjoy!

-tonymacx86 & MacMan

For discussions on this and other topics, register today at tonymacx86.com!

MultiBeast 3.0 Update

Today MultiBeast was updated to version 3.0.  We've made quite a few structural changes, including enabling all choices, so no options are greyed out.  The downside to this is you can now choose to install everything within a category.  Only check the top level choice and the specific sub-choice options.  Checking the category, or root option will most likely corrupt your installation by installing unwanted or unneeded options.

Please do not upload or redistribute MultiBeast to any other sites.   
Full list of changes:
  • Restructured menus: Advanced Options now separated into Drivers & Bootloaders and Customization.
  • Updated Chameleon 2.0 RC5 - Prerelease to r668.
  • Updated Chameleon 2.0 RC5 - ATI Experimental to r679.
  • Updated Chameleon post install script to correctly install on a dual boot system.
  • Added tonymacx86 theme Remixed by complx to Themes.
  • Changed EasyBeast and UserDSDT to install tonymacx86 theme Remixed by complx.
  • Removed all CPU-specific smbios.plist definitions.
  • Removed Chameleon 2.0 RC4 by AsereBLN 1.1.9
  • Replaced all Legacy88xHDA kexts with the new unified ALC8xxHDA kext.
  • Replaced LegacyAppleRTC with ElliottForceLegacyRTC for 32/64 bit support.
  • Updated EasyBeast and UserDSDT to use Chameleon 2.0 RC5 - Prerelease.
  • Updated EasyBeast to use ElliottForceLegacyRTC instead of LegacyAppleRTC
  • Added iMac11,2 and iMac11,3 System Definitions
If this utility has helped you, please consider a contribution to support further MultiBeast development.  Thanks in advance, and enjoy!

-tonymacx86 & MacMan

For discussions on this and other topics, register today at tonymacx86.com!

MultiBeast 3.5 Update


Today MultiBeast was updated to version 3.5.  The latest version is now available at tonymacx86.com/downloads.

Please do not upload or redistribute MultiBeast to any other sites. 

Full list of changes:
  • Added Chimera v1.0.0 r750 bootloader. This is MacMan's branch of Chameleon that merges Kabyl's ATI code and some of valv's Sandy Bridge code. 
  • Changed EasyBeast and UserDSDT to use the Chimera bootloader by default
  • Updated Chameleon 2.0 RC5 - Prerelease to r750
  • Added ATI 48xx Patch for 10.6.7 from netkas
  • Added Realtek Gigabit Ethernet 2.0.6 plugin
  • Changed UserDSDT script to install without a DSDT for a DSDT-Free install. Notification is in /private/var/log/install.log for whether a DSDT was installed or not.
  • Added Marvell Yukon Ethernet, a patched AppleYukon2 plugin that adds support for the Marvell Yukon-88E8056 and Yukon-88E8057 ethernet controllers. (Removed 3.5.1)
If this utility has helped you, please consider a contribution to support further MultiBeast development.  Thanks in advance, and enjoy!

-tonymacx86 & MacMan
For discussions on this and other topics, register today at tonymacx86.com!

MultiBeast 2.3.0 Update

Today MultiBeast was updated to version 2.3.0.  The main new feature is an improved UserDSDT which no longer requires a name change to work.  Any .aml file placed on the desktop will be installed correctly to /Extra as DSDT.aml.

Full list of changes:
  • Modified UserDSDT to use any file ending in .aml instead of only DSDT.aml
  • Upgraded the official Realtek RTL8169 driver to the latest version, 2.0.5
  • Added VoodooHDA 0.2.70 with prefPane.
  • All smbios.plist choices were edited to remove all unnecessary keys and values.
  • Corrected Chameleon Theme to install the correct theme.
  • Corrected PC-EFI Theme to install the correct theme.
  • Added VoodooHDA.prefPane to VoodooHDA 0.2.61
    If this utility has helped you, please consider a contribution to support further MultiBeast development.  Thanks in advance, and enjoy!

    -tonymacx86 & MacMan
    For discussions on this and other topics, register today at tonymacx86.com!

    MultiBeast 3.4 Update


    Today MultiBeast was updated to version 3.4.  The latest version is now available at tonymacx86.com/downloads.

    Please do not upload or redistribute MultiBeast to any other sites. 

    Full list of changes:
    • Added ATI 1.6.32.12 Drivers to Graphics. These are all of the updated ATI drivers from the Mac OS X 10.6.7 Update for early 2011 MacBook Pro (Sandy Bridge). This option will backup the currently installed versions to a folder on the desktop.
    • Added MacBookPro8,1 System Definition
    • Corrected description for Voodoo PS/2 Controller to "Enables non-USB keyboard/mouse and is 32-bit only."
    • Added Voodoo PS/2 Trackpad to Miscellaneous. This adds trackpad support for Laptops and requires Voodoo PS/2 Controller to also be installed. 32-bit only.
    If this utility has helped you, please consider a contribution to support further MultiBeast development.  Thanks in advance, and enjoy!

    -tonymacx86 & MacMan
    For discussions on this and other topics, register today at tonymacx86.com!

    MultiBeast 2.1.0 Update

    Today MultiBeast is updated to version 2.1.0.  This update is recommended for all users.  We've tested and retested all options to make sure this is the best MultiBeast yet.  And we've added a few nice new features:
    • PCI Root ID fix for GraphicsEnabler
    • ATI 5xxx beta Drivers
    • Realtek R8169 Official 32-bit drivers
    • VoodooHDA 0.2.1, 0.2.2, 0.2.56 and 0.2.61
    • Added to ATI 4800 Patch every ATI 48xx device id from AMD Developer site
    • Added to ATI 5000 Support every ATI 5xxx device id from AMD Developer site
    If this utility has helped you, please consider a contribution to support further MultiBeast development.  Thanks in advance, and enjoy!

    -tonymacx86 & MacMan
    For discussions on this and other topics, register today at tonymacx86.com!

    MultiBeast 2.5 Update

    This past weekend MultiBeast was updated to version 2.5 as part of the NVIDIA "Fermi" drivers update.

    Please do not upload or redistribute MultiBeast to any other sites. 

    Full list of changes:

    • Updated Chameleon 2.0 RC5 - Prerelease to RC5 r643 for Fermi based card support 
    • Added Chameleon 2.0 RC5 - ATI Experimental by Kabyl in Advanced Options -> Chameleon
    • Added ATI 48xx Patch for 10.6.5 to Advanced Options -> Kexts -> Graphics -> ATI
    • Changed Advanced Options -> smbios.plist -> MacPro to a menu
    • Moved existing MacPro4,1 smbios.plists to Advanced Options -> smbios.plist -> MacPro4,1
    • Added MacPro3,1 smbios.plist to Advanced Options -> smbios.plist -> MacPro3,1
    • Added MacPro5,1 smbios.plist to Advanced Options -> smbios.plist -> MacPro5,1
    • Added Auto-Detect CPU to Advanced Options -> smbios.plist -> iMac11,1
    • Added Auto-Detect CPU to Advanced Options -> smbios.plist -> MacPro3,1
    • Added Auto-Detect CPU to Advanced Options -> smbios.plist -> MacPro4,1
    • Added Auto-Detect CPU to Advanced Options -> smbios.plist -> MacPro5,1
    • Fixed all Mac Pro smbios.plists to have valid system-identifiers for each model serial number
    • Changed EasyBeast smbios.plist to MacPro3,1 Auto-Detect CPU
    • Changed UserDSDT smbios.plist to MacPro3,1 Auto-Detect CPU
    If this utility has helped you, please consider a contribution to support further MultiBeast development.  Thanks in advance, and enjoy!

    -tonymacx86 & MacMan

    For discussions on this and other topics, register today at tonymacx86.com!

    tonymacx86 Public Service Announcement: iBoot + MultiBeast


    Music and animation by Adamsmasher. Enjoy!

    For discussions on this and other topics, register today at tonymacx86.com!

    Updated NVIDIA Drivers for Mac OS X: Install Guide and iBoot-GE

    This week, NVIDIA released drivers for their line of "Fermi" cards for Mac OS X.  Besides supporting their new flagship Quadro 4000, these drivers support the GeForce GT 430, GTS 450, GTX 460, GTX 465, GTX 470, GTX 480. They also show increased OpenGL, Quartz Graphics, and User Interface performance for NVIDIA 2xx cards.

    To use the new drivers on any system, we made an alternate installer, tonymacx86 NVIDIA Update, that overcomes the official installer's system limitations.  We also created iBoot-GE, a new variation of iBoot that uses Chameleon's GraphicsEnabler instead of enabler kexts.  Finally, we've updated MultiBeast to include the necessary bootloader.
    • iBoot-GE uses Chameleon's GraphicsEnabler, with updated device IDs for new NVIDIA cards.  Update: iBoot now works for NVIDIA 4xx cards- you may need to type -x PCIRootUID=1 to install using these cards
      • MultiBeast now contains Chameleon 2.0 RC5 Prerelease which includes device IDs for all new NVIDIA cards.
      Guide for a Fresh Installation
      If you're starting from scratch, follow iBoot + MultiBeast.
      1. Install using iBoot
      2. Install latest Combo Update
      3. Install UserDSDT or EasyBeast, plus the latest Chameleon 2.0 RC5 from MultiBeast
      4. Install the tonymacx86 NVIDIA Update 
      5. Reboot

      Guide for an Existing Installation
      If you've already installed and configured your system to boot from hard drive
      1. Install latest Combo Update
      2. Install the latest Chameleon 2.0 RC5 from MultiBeast
      3. Install the tonymacx86 NVIDIA Update 
      4. Reboot
      Post your results in the forum!  Have fun, and enjoy!  

      -tonymacx86 & MacMan


      For discussions on this and other topics, register today at tonymacx86.com!

      tonymacx86 Chat & MultiBeast Screencast

      Ever have that quick question and you don't want to wait for a quick answer?

      I've opened up tonymacx86 Chat for registered members of the forum! I'm hoping this will become a place where issues can be solved quickly. Perhaps if your questions were answered in the forum or elsewhere, you'll donate a bit of time there to help others. Note: you'll need to re-register for the chat section of the site.


      Also, I've set up a YouTube channel and uploaded the first of a series of short screencasts. This one demonstrates the functionality of MultiBeast. It's pretty much my OSInstall.mpkg Method using MultiBeast for all of the post-installation processes. A complete terminal-free install process with one reboot. It will take you through the steps necessary to fully install Mac OS X Snow Leopard in under ten minutes.

      Just a few tidbits until the full iBoot + MultiBeast guide is out. See you on the forum!

      -tonymacx86
      For discussions on this and other topics, register today at tonymacx86.com!

      MultiBeast 3.1 Update

      Today MultiBeast was updated to version 3.1.  The latest version is now available at tonymacx86.com/downloads.

      Please do not upload or redistribute MultiBeast to any other sites.   
      Full list of changes:
      • Added ATI 48xx Patch for 10.6.6
      • Updated Chameleon 2.0 RC5 - Prerelease (trunk) to r699
      • Updated Chameleon 2.0 RC5 - ATI Experimental (Kabyl branch) to r700
      • Replaced fakesmc 2.5.0 with FakeSMC 3.1.0. 
      • Added to Drivers & Bootloaders -> Kexts & Enablers -> Miscellaneous -> FakeSMC Plugins.  This installs the following FakeSMC plugins in /Extra/Extensions: ACPIMonitor.kext, IntelThermal.kext and SuperIOFamily.kext.  Additional plugins can be found at Project OS X.  Credit to Slice and netkas.  
      • Updated ALC8xxHDA to version 1.0.1. This version restores Green Line Out and Headphone functionality to how Legacy8xx works.
      • Added bdmesg command line tool as part of all Chameleon installs.
      If this utility has helped you, please consider a contribution to support further MultiBeast development.  Thanks in advance, and enjoy!

      -tonymacx86 & MacMan

      For discussions on this and other topics, register today at tonymacx86.com!

      Create a Chameleon USB Rescue Drive Using MultiBeast

      It's always a good idea to keep a copy of iBoot on hand in case things go wrong with your install. You can easily boot from it and then choose your system drive.  But what happens when you don't have access to an optical drive?  Things can get complicated. Here's a guide that will help you install Chameleon and other necessary files on any USB flash drive.

      PLEASE NOTE: USB Rescue drives will NOT boot the Mac OS X Retail DVD.  You will need an optical drive to do an installation using iBoot + MultiBeast.

      YOU WILL NEED
      • A blank USB drive of any size- even an old 512mb one will work!
      • A computer running Mac OS X
      • MultiBeast
      • Your motherboard-specific DSDT from the DSDT Database
      STEP 1: FORMAT THE USB DRIVE
      1. Boot into your existing Mac OS X Installation.
      2. Insert your USB drive.
      3. Open Applications/Utilities/Disk Utility
      4. Highlight your USB drive in the left column.
      5. Click the Partition Tab.
      6. Click Volume Scheme- choose 1 Partition
      7. Click Options…
      8. Select GUID Partition Table. Click OK.
      9. In the Name: field type: USB Rescue
      10. In Format: field select Mac OS Extended (Case Sensitive, Journaled)
      11. Click Apply, then click Partition.
      STEP 2: DOWNLOAD YOUR MOTHERBOARD'S DSDT
      1. Visit the DSDT Database
      2. Download your motherboard's DSDT, and place the .aml file on the Desktop
      STEP 3: RUN MULTIBEAST ON THE USB DRIVE
      1. Open MultiBeast
      2. In Select a Destination screen, choose USB Rescue (If you don't get this option,  press Continue, then select Change Install Location...)
      3. Select UserDSDT
      4. Click Continue, then Install
      There you have it!  A Chameleon USB Rescue drive!  If you ever need to boot from it, go to your computer's boot menu at startup (F12 on Gigabyte boards) and choose the USB drive. When you get to the Chameleon boot screen, choose your system drive. If you have any issues booting your hard drive, you can always use -s to enter single-user mode to modify and repair disk, -x to enter safe mode, or -v for verbose mode.

       -tonymacx86 & MacMan
      For discussions on this and other topics, register today at tonymacx86.com!

      iBoot + MultiBeast: Install Mac OS X on any Intel-based PC

      Any OSx86 installation guide can seem daunting at first glance, especially when trying to remember cryptic terminal commands and sorting through volumes of misinformation on the web.  This guide requires no coding, terminal work, or Mac experience of any kind.  You will not need access to a Mac.  In fact, it's easier and faster for me to install Snow Leopard with fully working components on my system than it is to install Windows 7.  And more fun.

      The iBoot + MultiBeast method is designed and tested for any desktop or laptop running the latest line of Intel processors, the Core i3/i5/i7s.  I have had reports of success with older machines as well including CoreDuo, Core2Duo, and even Pentium 4.  However, AMD processors are not supported.

      YOU WILL NEED

      • A computer running an Intel Processor
      • A blank CD
      • A Mac OS X Snow Leopard Retail DVD
      • To leave any fear of your computer at the door.
      • Patience and humility- it may not work out perfectly the first time- but with enough tenacity and grit, you'll reach the promised land.  It's easy to get frustrated, but don't give up!  There are a community of users with similar hardware in the tonymacx86 Forum to provide support if you get stuck.
      BEFORE YOU BEGIN
      • If you have greater than 4gb of RAM, remove the extra RAM for a maximum of 4gb.  You can put back any extra RAM in after the installation process.
      • Use only 1 graphics card in the 1st PCIe slot with 1 monitor plugged in.
      • Remove any hard drives besides the blank drive being used for OS X.
      • Remove any USB peripherals besides keyboard and mouse.
      • Remove any PCI cards besides graphics- they may not be Mac compatible.
      • If using a Gigabyte 1156 board, use the blue Intel SATA ports- not the white Gigabyte SATA ports.
      • It's best to use an empty hard drive- you will have to partition and format the drive. 
      • Always back up any of your important data.
      STEP 1: BIOS SETTINGS
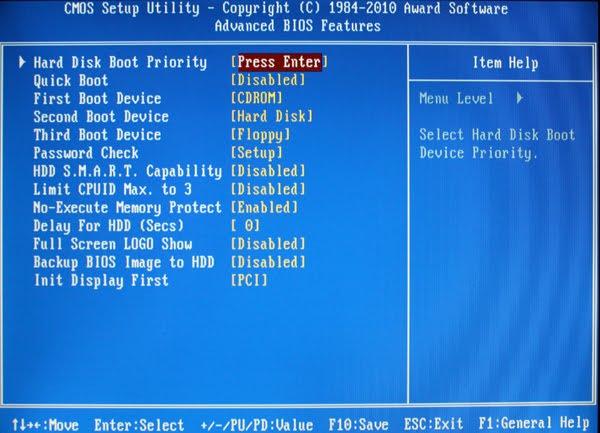
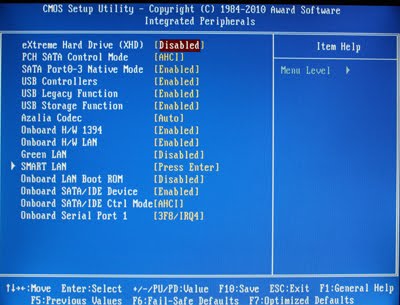
      You will need to set your BIOS to ACHI mode and your Boot Priority to boot from CD-ROM first.  This is the most important step, and one many people overlook.  Make sure your bios settings match these.  It's not difficult- the only thing I did on my Gigabyte board besides setting Boot Priority to CD/DVD first was set Optimized Defaults, change SATA to AHCI mode, and set HPET to 64-bit mode.

      STEP 2: INSTALL MAC OS X 

      In order to boot the Mac OS X Retail DVD, you'll need to download and burn iBoot.  For desktops and laptops using unsupported Intel CPUs and graphics, a legacy version of iBoot can be downloaded here.
      1. Download iBoot
      2. Burn the image to CD
      3. Place iBoot in CD/DVD drive
      4. Restart computer
      5. At Chameleon prompt, eject iBoot


      6. Insert your Mac OS X Snow Leopard Retail DVD and press F5
      7. When you see the screen below, press enter to begin the boot process
      8. When you get to the installation screen, open Utilities/Disk Utility.  NOTE: If you cannot get to the installation screen, retry from Step 4, type PCIRootUID=1 before hitting enter. If that doesn't work then try PCIRootUID=1 -x or just -x which will enter Mac OS X Safe Mode and will allow you to proceed.
      9. Partition your hard drive to GUID Partition Table
      10. Format your hard drive to Mac OS Extended (Journaled).   NOTE: Chameleon can only boot from a disk or partition of 1 TB or less.  Partition larger drives.
      11. For the purposes of this guide, name it Snow Leopard.  You can rename it later.
      12. Close Disk Utility
      13. When the installer asks you where to install, choose Snow Leopard
      14. Choose Customize‚ and uncheck additional options.  This will hasten the install process.  You can always install this stuff later.
      15. Restart computer.
      16. Place iBoot back in drive.
      17. When you get to the Chameleon boot selection screen, choose your new Snow Leopard installation.
      18. View the super-cool Mac OS X Snow Leopard Welcome Video, and set up your computer!

      STEP 3: UPDATE TO 10.6.7
      Upon the release of 10.6.2 and the 27" Intel Core i5 and i7 iMacs, Mac OS X Snow Leopard officially supports the Core i5 750 and Core i7 860.  The 10.6.6 Update will install a Vanilla Kernel, as well as a host of security and stability fixes. Details are available on Apple's website.
      1. Open Finder and navigate to your Snow Leopard drive.
      2. Right-click and delete Mac OS X Install Folder.  This folder is an unnecessary remnant of the installation process, and serves no purpose.
      3. Download the Mac OS X 10.6.7 Combo Update
      4. Download MultiBeast
      5. Open MultiBeast- don't run it yet, just leave it open.  Set up windows as shown.
      6. Mount MacOSXUpdCombo10.6.7.dmg
      7. Install MacOSXUpdCombo10.6.7.pkg
      8. Upon completion, the installer will ask you to reboot.  DO NOT REBOOT.
      9. Switch to the already open MultiBeast.  If it closes, just re-open it.
      STEP 4: MULTIBEAST
      MultiBeast is an all-in-one post-installation tool designed to enable boot from hard drive, and install support for Audio, Network, and Graphics. It contains two different complete post-installation solutions: EasyBeast and UserDSDT.  In addition it includes System Utilities to rebuild caches and repair permissions and a collection of drivers, boot loaders, boot time config files and handy software.

      Choose one of the following options directly following a fresh installation and update:  

      EasyBeast is a DSDT-free solution for any Core/Core2/Core i system. It installs all of the essentials to allow your system to boot from the hard drive. Audio, Graphics and Network will have to be enabled separately.  

      UserDSDT is a bare-minimum solution for those who have their own pre-edited DSDT. Place your DSDT.aml on the desktop before install. Audio, Graphics and Network will have to be enabled separately.  HINT: Check the DSDT Database for a pre-edited DSDT.
      1. Run MultiBeast.
      2. If you have a custom DSDT that's been edited, place the file on your desktop and choose UserDSDT.
      3. All others select EasyBeast 
      4. Select System Utilities.
      5. Optionally, you may install further drivers via Advanced Options to enable ethernet, sound, graphics, etc...  Be sure to read the documentation provided about each installation option.  NOTE: EasyBeast, and UserDSDT install Chameleon 2.0 RC5 by default, so you'll not need to check that option.     
      6. Install to Snow Leopard- it should take about 4 minutes to run scripts.
      7. Eject iBoot.
      8. Reboot- from your new Snow Leopard installation drive.

      Congratulations!  You're done!!

      Your PC is now fully operational, while running the latest version of Mac OS X Snow Leopard!  And you have a nice Boot CD to get into your system in case things go awry.  Boot your system from iBoot if you have issues.  You may run MultiBeast as often as you like.

      If you can't boot, try typing -x at the Chameleon prompt to enter safe mode, or just boot with iBoot.  When you get to the desktop, you can make all of the changes you need to.  The best way to start fresh is delete whatever you're trying to get rid of- including the whole /Extra folder, as most kexts are installed there.  Then you can re-run MultiBeast.  As long as you rebuild caches and repair permissions after you're done, you can do just about anything you want to /Extra/Extensions and /System/Library/Extensions.  Anything can be tweaked and enabled upon subsequent uses of MultiBeast.

      If you've had success using iBoot + MultiBeast, consider a contribution to help keep the sites going.  We're constantly updating and tweaking our tools to help you.

      Thanks in advance!

      -tonymacx86 & MacMan


      PS: For our most current workarounds and solutions for issues such as USB and audio, check out the Mac OS X 10.6.3 Update Mac OS X 10.6.4 Update,  Mac OS X 10.6.5 UpdateMac OS X 10.6.6 Update, and Mac OS X 10.6.7 Update articles.   Good luck, and see you on the forum!

      Related Posts: Dual Boot Windows 7 and OS X Snow Leopard Using Chameleon
      For discussions on this and other topics, register today at tonymacx86.com!

      MultiBeast - The Ultimate Post-Installation Utility

      Introducing my latest creation...

      MultiBeast is an all-in-one post-installation tool designed to enable boot from hard drive, and install support for Audio, Network, and Graphics. It contains two different complete post-installation solutions: EasyBeast and UserDSDT. In addition it includes System Utilities to rebuild caches and repair permissions and a collection of drivers, boot loaders, boot time config files and handy software.

      Choose one of the following options directly following a fresh installation and update:  

      EasyBeast is a DSDT-free solution for any Core/Core2/Core i system. It installs all of the essentials to allow your system to boot from the hard drive. Audio, Graphics and Network will have to be enabled separately.  

      UserDSDT is a bare-minimum solution for those who have their own pre-edited DSDT. Place your DSDT.aml on the desktop before install. Audio, Graphics and Network will have to be enabled separately.

      For full guide and method, check out iBoot + MultiBeast.

      For demonstration videos and updates, check out MultiBeast 2.0.


      If this utility has helped you, please consider a contribution to support further MultiBeast development.  Thanks in advance, and enjoy!
      For discussions on this and other topics, register today at tonymacx86.com!

      MultiBeast 2.4.0 Update

      Today MultiBeast was updated to version 2.4.0.  We've added Core i3 options to smbios,plist, Chameleon RC5 Prerelease, USB 3.0 support, as well as a few other additions, fixes and features. Please do not upload or redistribute MultiBeast to any other sites. 

      Full list of changes:
      • Added Core i3 smbios.plist for iMac and Mac Pro
      • Added Chameleon 2.0 RC5 r594 Prerelease
      • Added Chameleon RC5 Default Theme
      • Added USB 3.0 Support - LaCie driver patched by modbin
      • Added VoodooHDA 0.2.72 with prefPane
      • Merged VoodooHDA Official and Experimental choices and clarified VoodooLabs and Project OS X branches in descriptions
      • Set all VoodooHDA Verbose outputs to 0 in info.plist
      • Replaced MacPro3,1 with MacPro4,1 in smbios.plist
      • Renamed menu choice JMicron36xATA to JMicron36x ATA
      • Renamed menu choice JMicron36xSATA to JMicron36x SATA
      • Renamed menu choice JMicron36xeSATA to JMicron36x eSATA
      If this utility has helped you, please consider a contribution to support further MultiBeast development.  Thanks in advance, and enjoy!

      -tonymacx86 & MacMan

      For discussions on this and other topics, register today at tonymacx86.com!