Windows XP is the most amicable series of operating system, which has been developed by Microsoft and was introduced on October 25, 2001. It was the first version, where Microsoft put the restriction of product activation, to combat illegal copying.
Read this blog to know the authentic method of installing Windows XP.
First you should check the compatibility of Windows XP with hardware configuration of your computer.
“As per recommendation you must have a computer equipped with a processor of minimum 233 MHz to 300 MHz or higher, minimum memory around 64 MB RAM2 to 128 MB RAM or higher, video adapter and monitor -Super VGA (800 x 600) or higher resolution and Hard drive disk free space -1.5 GB or higher”
Note: Additional 1.8 GB in Service Pack 2 and additional 900 MB in Service Pack 3
You can follow the given steps to install Windows XP on your computer.
Step 1. Load your DVD tray with Windows XP installation CD/DVD.
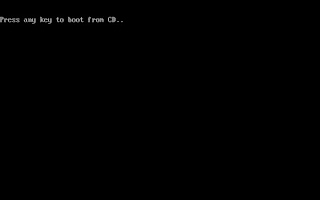
Step 2. Restart your computer and press any key when prompted to do so.
Step 3. As the content of the DVD is getting copied, you receive a message like "Disc one - (#)Megabytes". Press D button of your keyboard.
Step 4. To create new partition press “C.” You are flexible to decide number of partition and size of each. Press Enter once you have decided the size. You can decide the partition, where you want to locate operating system XP’s file. Choose the file system as “NTFS” as permitted for Windows XP and complete the installation procedure with the help of on-screen prompts.
Next step in Windows XP installation is to equip it with compatible device drivers for network adapter, wireless adapters, CD-ROMS, Hard Drives, Video Cards, and Printers so that you can accomplish your task perfectly.
Showing posts with label Windows XP Installation. Show all posts
Showing posts with label Windows XP Installation. Show all posts
Hard disk space required for installing Windows XP SP3 on one computer
In this post list the hard disk space that is required to install Windows XP SP3 on one computer. Space requirements vary depending on the location from which you want to download or install the service pack, and whether you enable or disable System Restore.
Note We recommend that you read the "Notes" section for table descriptions and more information that you may have to have to install Windows XP SP3.
Hard disk space required if you install Windows XP SP3 from a shared folder on the network
To install Windows XP SP3 from a shared folder on the network, make sure that the computer meets the minimal space requirements shown in the following table:
System Restore feature enabled System Restore feature disabled
Working space 80 megabytes (MB) 80 MB
Files that remove Windows XP SP3 256 MB 256 MB
Total hard disk space that is required 1020 MB available after installation
1100 MB peak usage during installation 380 MB available after installation 460 MB peak
usage during installation
Hard disk space required if you install Windows XP SP3 from the Windows XP SP3 CD
To install Windows XP SP3 from the Windows XP SP3 CD, make sure that the computer meets the minimal space requirements shown in the following table:
System Restore feature enabled System Restore feature disabled
Working space 280 MB 480 MB
Files that remove Windows XP SP3 256 MB 256 MB
Total hard disk space that is required 1485 MB available after installation
1765 MB peak usage during installation 750 MB available after installation 1230 MB peak
usage during installation
Note We recommend that you read the "Notes" section for table descriptions and more information that you may have to have to install Windows XP SP3.
Hard disk space required if you install Windows XP SP3 from a shared folder on the network
To install Windows XP SP3 from a shared folder on the network, make sure that the computer meets the minimal space requirements shown in the following table:
System Restore feature enabled System Restore feature disabled
Working space 80 megabytes (MB) 80 MB
Files that remove Windows XP SP3 256 MB 256 MB
Total hard disk space that is required 1020 MB available after installation
1100 MB peak usage during installation 380 MB available after installation 460 MB peak
usage during installation
Hard disk space required if you install Windows XP SP3 from the Windows XP SP3 CD
To install Windows XP SP3 from the Windows XP SP3 CD, make sure that the computer meets the minimal space requirements shown in the following table:
System Restore feature enabled System Restore feature disabled
Working space 280 MB 480 MB
Files that remove Windows XP SP3 256 MB 256 MB
Total hard disk space that is required 1485 MB available after installation
1765 MB peak usage during installation 750 MB available after installation 1230 MB peak
usage during installation

Installation Process Of Windows XP
Windows XP operating system is very user friendly for use with computer system. If youi want r to Install Windows 98, Windows ME, Windows NT and later version of XP you can. But mostly people do not know installation process for the windows XP. Mostly computers come new PC already installed Windows XP. But If due to any reason your OS is corrupted and you want to reinstall fresh Windows XP on your computer you can follow the steps of Installation Process of XP.
Installation Process
Installing Windows XP can take up to two hours. To make the process more manageable, it has been broken up into several sections. When you are ready, install Windows XP:
Section 1: Begin the Installation
1. Insert the Windows XP CD into your computer and restart your computer.
2. If prompted to start from the CD, press SPACEBAR. If you miss the prompt (it only appears for a few seconds), restart your computer to try again.
 3. Windows XP Setup begins. During this portion of setup, your mouse will not work, so you must use the keyboard. On the Welcome to Setup page, press ENTER.

4. On the Windows XP Licensing Agreement page, read the licensing agreement. Press the PAGE DOWN key to scroll to the bottom of the agreement. Then press F8.
 5. This page enables you to select the hard disk drive on which Windows XP will be installed. Once you complete this step, all data on your hard disk drive will be removed and cannot be recovered. It is extremely important that you have a recent backup copy of your files before continuing. When you have a backup copy, press D, and then press L when prompted. This deletes your existing data.
6. Press ENTER to select Unpartitioned space, which appears by default.
 7. Press ENTER again to select Format the partition using the NTFS file system, which appears by default.
 8. Windows XP erases your hard disk drive using a process called formatting and then copies the setup files. You can leave your computer and return in 20 to 30 minutes.

Section 2: Continue the installation
9. Windows XP restarts and then continues with the installation process. From this point forward, you can use your mouse. Eventually, the Regional and Language Options page appears. Click Next to accept the default settings. If you are multilingual or prefer a language other than English, you can change language settings after setup is complete.
 10. On the Personalize Your Software page, type your name and your organization name. Some programs use this information to automatically fill in your name when required. Then, click Next.
 11. On the Your Product Key page, type your product key as it appears on your Windows XP CD case. The product key is unique for every Windows XP installation. Then, click Next.
 12. On the Computer Name and Administrator Password page, in the Computer name box, type a name that uniquely identifies your computer in your house, such as FAMILYROOM or TOMS. You cannot use spaces or punctuation. If you connect your computer to a network, you will use this computer name to find shared files and printers. Type a strong password that you can remember in the Administrator password box, and then retype it in the Confirm password box. Write the password down and store it in a secure place. Click Next.
 13. On the Date and Time Settings page, set your computer’s clock. Then, click the Time Zone down arrow, and select your time zone. Click Next.
 14. Windows XP will spend about a minute configuring your computer. On the Networking Settings page, click Next.
 15. On the Workgroup or Computer Domain page, click Next.
 Section 3: Complete the installation
16. Windows XP will spend 20 or 30 minutes configuring your computer and will automatically restart when finished. When the Display Settings dialog appears, click OK.
 17. When the Monitor Settings dialog box appears, click OK.
 18. The final stage of setup begins. On the Welcome to Microsoft Windows page, click Next.
 19. On the Help protect your PC page, click Help protect my PC by turning on Automatic Updates now. Then, click Next.
 20. Windows XP will then check if you are connected to the Internet:
•If you are connected to the Internet, select the choice that describes your network connection on the Will this computer connect to the Internet directly, or through a network? page. If you’re not sure, accept the default selection, and click Next.
 •If you use dial-up Internet access, or if Windows XP cannot connect to the Internet, you can connect to the Internet after setup is complete. On the How will this computer connect to the Internet? page, click Skip.
 21. Windows XP Setup displays the Ready to activate Windows? page. If you are connected to the Internet, click Yes, and then click Next. If you are not yet connected to the Internet, click No, click Next, and then skip to step 24. After setup is complete, Windows XP will automatically remind you to activate and register your copy of Windows XP.
 22. On the Ready to register with Microsoft? page, click Yes, and then click Next.
 23. On the Collecting Registration Information page, complete the form. Then, click Next.
 24. On the Who will use this computer? page, type the name of each person who will use the computer. You can use first names only, nicknames, or full names. Then click Next. To add users after setup is complete or to specify a password to keep your account private, read Create and customize user accounts.
 25. On the Thank you! page, click Finish.
 Congratulations! Windows XP setup is complete. You can log on by clicking your name on the logon screen. If you’ve installed Windows XP on a new computer or new hard disk drive, you can now use the File and Settings Transfer Wizard to copy your important data to your computer or hard disk drive.
After logon, take a few minutes to validate your copy of Windows. Validation gives you access to hundreds of free downloads from the Microsoft Download Center. To learn about the new features Windows XP provides, click the Start button, click All Programs, click Accessories, and then click Tour Windows XP. I hope that it is useful for XP users who want to install Windows XP.
Installation Process
Installing Windows XP can take up to two hours. To make the process more manageable, it has been broken up into several sections. When you are ready, install Windows XP:
Section 1: Begin the Installation
1. Insert the Windows XP CD into your computer and restart your computer.
2. If prompted to start from the CD, press SPACEBAR. If you miss the prompt (it only appears for a few seconds), restart your computer to try again.
 3. Windows XP Setup begins. During this portion of setup, your mouse will not work, so you must use the keyboard. On the Welcome to Setup page, press ENTER.
4. On the Windows XP Licensing Agreement page, read the licensing agreement. Press the PAGE DOWN key to scroll to the bottom of the agreement. Then press F8.
 5. This page enables you to select the hard disk drive on which Windows XP will be installed. Once you complete this step, all data on your hard disk drive will be removed and cannot be recovered. It is extremely important that you have a recent backup copy of your files before continuing. When you have a backup copy, press D, and then press L when prompted. This deletes your existing data.
6. Press ENTER to select Unpartitioned space, which appears by default.
 7. Press ENTER again to select Format the partition using the NTFS file system, which appears by default.
 8. Windows XP erases your hard disk drive using a process called formatting and then copies the setup files. You can leave your computer and return in 20 to 30 minutes.
Section 2: Continue the installation
9. Windows XP restarts and then continues with the installation process. From this point forward, you can use your mouse. Eventually, the Regional and Language Options page appears. Click Next to accept the default settings. If you are multilingual or prefer a language other than English, you can change language settings after setup is complete.
 10. On the Personalize Your Software page, type your name and your organization name. Some programs use this information to automatically fill in your name when required. Then, click Next.
 11. On the Your Product Key page, type your product key as it appears on your Windows XP CD case. The product key is unique for every Windows XP installation. Then, click Next.
 12. On the Computer Name and Administrator Password page, in the Computer name box, type a name that uniquely identifies your computer in your house, such as FAMILYROOM or TOMS. You cannot use spaces or punctuation. If you connect your computer to a network, you will use this computer name to find shared files and printers. Type a strong password that you can remember in the Administrator password box, and then retype it in the Confirm password box. Write the password down and store it in a secure place. Click Next.
 13. On the Date and Time Settings page, set your computer’s clock. Then, click the Time Zone down arrow, and select your time zone. Click Next.
 14. Windows XP will spend about a minute configuring your computer. On the Networking Settings page, click Next.
 15. On the Workgroup or Computer Domain page, click Next.
 Section 3: Complete the installation
16. Windows XP will spend 20 or 30 minutes configuring your computer and will automatically restart when finished. When the Display Settings dialog appears, click OK.
 17. When the Monitor Settings dialog box appears, click OK.
 18. The final stage of setup begins. On the Welcome to Microsoft Windows page, click Next.
 19. On the Help protect your PC page, click Help protect my PC by turning on Automatic Updates now. Then, click Next.
 20. Windows XP will then check if you are connected to the Internet:
•If you are connected to the Internet, select the choice that describes your network connection on the Will this computer connect to the Internet directly, or through a network? page. If you’re not sure, accept the default selection, and click Next.
 •If you use dial-up Internet access, or if Windows XP cannot connect to the Internet, you can connect to the Internet after setup is complete. On the How will this computer connect to the Internet? page, click Skip.
 21. Windows XP Setup displays the Ready to activate Windows? page. If you are connected to the Internet, click Yes, and then click Next. If you are not yet connected to the Internet, click No, click Next, and then skip to step 24. After setup is complete, Windows XP will automatically remind you to activate and register your copy of Windows XP.
 22. On the Ready to register with Microsoft? page, click Yes, and then click Next.
 23. On the Collecting Registration Information page, complete the form. Then, click Next.
 24. On the Who will use this computer? page, type the name of each person who will use the computer. You can use first names only, nicknames, or full names. Then click Next. To add users after setup is complete or to specify a password to keep your account private, read Create and customize user accounts.
 25. On the Thank you! page, click Finish.
 Congratulations! Windows XP setup is complete. You can log on by clicking your name on the logon screen. If you’ve installed Windows XP on a new computer or new hard disk drive, you can now use the File and Settings Transfer Wizard to copy your important data to your computer or hard disk drive.
After logon, take a few minutes to validate your copy of Windows. Validation gives you access to hundreds of free downloads from the Microsoft Download Center. To learn about the new features Windows XP provides, click the Start button, click All Programs, click Accessories, and then click Tour Windows XP. I hope that it is useful for XP users who want to install Windows XP.
Subscribe to:
Posts (Atom)