Showing posts with label DDRAM. Show all posts

Different types of RAMs

Different types of RAMs

RAM : - The type of RAM doesn't matter nearly as much as how much of it you've got, but using plain old SDRAM memory today will slow you down.
There are main types of RAM: SDRAM, DDR and Rambus DRAM.

SDRAM (Synchronous DRAM): -
Almost all systems used to ship with 3.3 volt, 168-pin SDRAM DIMMs. SDRAM is not an extension of older EDO DRAM but a new type of DRAM altogether. SDRAM started out running at 66 MHz, while older fast page mode DRAM and EDO max out at 50 MHz. SDRAM is able to scale to 133 MHz (PC133) officially, and unofficially up to 180MHz or higher. As processors get faster, new generations of memory such as DDR and RDRAM are required to get proper performance.


DDR (Double Data Rate SDRAM): -
DDR basically doubles the rate of data transfer of standard SDRAM by transferring data on the up and down tick of a clock cycle. DDR memory operating at 333MHz actually operates at 166MHz * 2 (aka PC333 / PC2700) or 133MHz*2 (PC266 / PC2100). DDR is a 2.5 volt technology that uses 184 pins in its DIMMs. It is incompatible with SDRAM physically, but uses a similar parallel bus, making it easier to implement than RDRAM, which is a different technology.


Rambus DRAM (RDRAM): -
Despite it's higher price, Intel has given RDRAM it's blessing for the consumer market, and it will be the sole choice of memory for Intel's Pentium 4. RDRAM is a serial memory technology that arrived in three flavors, PC600, PC700, and PC800. PC800 RDRAM has double the maximum throughput of old PC100 SDRAM, but a higher latency. RDRAM designs with multiple channels, such as those in Pentium 4 motherboards, are currently at the top of the heap in memory throughput, especially when paired with PC1066 RDRAM memory.

DIMMs vs. RIMMs: -
DRAM comes in two major form factors: DIMMs and RIMMS.

DIMMs are 64-bit components, but if used in a motherboard with a dual-channel configuration (like with an Nvidia nForce chipset) you must pair them to get maximum performance. So far there aren't many DDR chipset that use dual-channels. Typically, if you want to add 512 MB of DIMM memory to your machine, you just pop in a 512 MB DIMM if you've got an available slot. DIMMs for SDRAM and DDR are different, and not physically compatible. SDRAM DIMMs have 168-pins and run at 3.3 volts, while DDR DIMMs have 184-pins and run at 2.5 volts.


RIMMs use only a 16-bit interface but run at higher speeds than DDR. To get maximum performance, Intel RDRAM chipsets require the use of RIMMs in pairs over a dual-channel 32-bit interface. You have to plan more when upgrading and purchasing RDRAM.

Memory Speed: -
SDRAM initially shipped at a speed of 66MHz. As memory buses got faster, it was pumped up to 100MHz, and then 133MHz. The speed grades are referred to as PC66 (unofficially), PC100 and PC133 SDRAM respectively. Some manufacturers are shipping a PC150 speed grade. However, this is an unofficial speed rating, and of little use unless you plan to overclock your system.

DDR comes in PC1600, PC2100, PC2700 and PC3200 DIMMs. A PC1600 DIMM is made up of PC200 DDR chips, while a PC2100 DIMM is made up of PC266 chips. PC2700 uses PC333 DDR chips and PC3200 uses PC400 chips that haven't gained widespread support. Go for PC2700 DDR. It is about the cost of PC2100 memory and will give you better performance.

How to Replace a Computer Processor


You've decided to take the plunge and upgrade your computer's processor. This article will explain how to replace a computer processor.

Collecting Information

1. Before you open your computer, you need to do some preliminary work. Are you planning to upgrade to the next generation of processor? Are you moving from a Pentium III to a Pentium IV or from a Pentium IV to a Core Duo? If so, just buying a processor won't be enough. You will need a new motherboard and RAM memory in addition to the new CPU. You will need to make sure all these parts work together..
If you are upgrading within the same processor family--a faster version of the Pentium III or the Pentium IV or the Core Duo--to replace the one you're using now, you may be able to keep your existing motherboard and RAM memory. But again, you will have to do a little preliminary work.

2. Determine the make, model, and revision number of your motherboard. You will need this information to know what processor speeds it supports. If you bought your computer from Hewlett Packard or Dell or a retailer like Best Buy, call their technical support. Tell them which model you have--whether it's the HP Pavilion a6710 or the Dell Inspiron 530, for example. They should be able to locate this info for you. You could also open the case and look for identifying text on the actual component.


3. Determine the speed and type of your RAM memory. Is it DDR 333MHz? DDR 400 MHZ? It matters, because the speed of your new processor needs to be some multiple of your memory for them to work well together. Example: A 2.33 GHz processor is well matched with 333MHz or 667MHz memory, but not well matched with 400MHz or 800MHz memory. A 2.4 GHz processor is well matched with 400MHz or 800MHz memory but not 333MHz or 667MHz memory.
Note: In most cases, the new processor will still work with your memory. It will just run the memory at a lower but more compatible speed to eliminate these timing issues. You could decide to accept the penalty of course, but it partially defeats the purpose of moving to a faster processor if your memory runs slower.

Changing The Chip

1. You have chosen a CPU your motherboard supports and is an even multiple of your memory. It's time to install it. Disconnect the power and all cables from the back of your computer.


2. Remove the case. Note that older cases like this one use screws. Newer ones have done away with them in favor of an access panel with quick release levers.


3. Remove your graphics and other peripheral cards. Handle them by their edges. Do not touch the contacts on the bottom of the card.


4. Disconnect data and power cables from the motherboard.


5. Remove the screws holding the motherboard in place.


6. Remove your motherboard. Place it on an anti-static surface. In this case, the motherboard is sitting on an anti-static bag that previously contained a different motherboard.


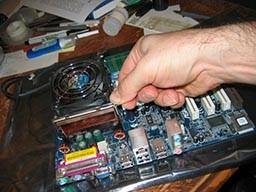
7. Unlatch and remove the heat sink and fan. Note that the hardware holding a heat sink/fan combination in place always seems to change from one generation of processor to the next. The arrangement pictured here is for a Pentium 4 motherboard. So unless you are also upgrading a Pentium 4, you are likely to see a different latching mechanism.


8. Release the Zero Insertion Force (ZIF) lever.


9. Remove your old chip. Be careful to touch it by the edges only.


10. Put in your new CPU and close the ZIF lever. Note that CPUs, whether from Intel or AMD, will have a marking like this arrow and/or a physical shape that assures it will only go in its socket one way.

11. Apply a small amount of heat paste. The purpose of this substance is to make sure there is good contact between the CPU and heat sink so that the latter will draw away heat.

12. Reinstall the heat sink and fan.
13. Return your motherboard to its case and refasten its screws. Plug in data and power cables. Plug in your expansion cards and close the case. You're ready to go again. Only a bit faster.


Warning!

Be careful when handling expansion cards, motherboards and CPUs. Do not touch exposed contacts. Not because it will hurt you, but because it will hurt your components. Your body produces enough static electricity to burn them out. You would be well advised to use a grounding strap. (A grounding strap can be nothing more than a long piece of wire with exposed conductor at each end. Wrap one end around your wrist and the other around some metal object. This will "ground" you, or drain away static electricity.)