This post provide support for configure Windows XP to start by using a clean boot. You can also Create Multiple Boot system with Windows XP
To configure Windows XP using clean boot You must be logged on as an administrator or a member of the Administrators group to configure Windows XP to start by using a clean boot.
Manual steps to perform a clean boot in Windows XP
Step 1: Start the System Configuration Utility
Click Start, click Run, type msconfig , and then click OK.
The System Configuration Utility dialog box appears.
Step 2: Configure selective startup options
1. In the System Configuration Utility dialog box, click the General tab, and then click Selective Startup.
2. Click to clear the Process SYSTEM.INI File check box.
3. Click to clear the Process WIN.INI File check box.
4. Click to clear the Load Startup Items check box.
5. Click the Services tab.
6. Click to select the Hide All Microsoft Services check box.
7. Click Disable All, and then click OK..
8. When you are prompted, click Restart to restart the computer.
Step 3: Log on to Windows
1. Log on to Windows.
2. When you receive the following message, click to select the Don't show this message or launch the System Configuration Utility when Windows start check box, and then click OK:
You have used the System Configuration Utility to make changes to the way Windows starts.
The System Configuration Utility is currently in Diagnostic or Selective Startup mode, causing this message to be displayed and the utility to run every time Windows starts.
Choose the Normal Startup mode on the General tab to start Windows normally and undo the changes you made using the System Configuration Utility.
Showing posts with label windows support. Show all posts
Showing posts with label windows support. Show all posts
Windows XP support for the Opteron processor
This post outlines the computer support policy for using 32-bit Microsoft Windows XP with the Advanced Micro Devices (AMD) Opteron processor.
Microsoft Product Support Services will support x86-based Windows XP Home and Professional versions when they run on AMD Opteron-based systems. The level of support for Windows XP on specific hardware is determined by one of the following criteria:
To download the latest Windows HCL, visit the following Microsoft Web site:
http://www.microsoft.com/whdc/hcl/default.mspx
For more information about the support of non-HCL hardware, click the following article number to view the article in the Microsoft Knowledge Base:
Microsoft support policy on hardware not on Windows NT HCL
Note the following about AMD64-based systems:
Microsoft Product Support Services will support x86-based Windows XP Home and Professional versions when they run on AMD Opteron-based systems. The level of support for Windows XP on specific hardware is determined by one of the following criteria:
- Whether the hardware and drivers have completed the Microsoft Hardware Logo Program
- Whether the hardware is listed on the Hardware Compatibility List (HCL)
To download the latest Windows HCL, visit the following Microsoft Web site:
http://www.microsoft.com/whdc/hcl/default.mspx
For more information about the support of non-HCL hardware, click the following article number to view the article in the Microsoft Knowledge Base:
Microsoft support policy on hardware not on Windows NT HCL
Note the following about AMD64-based systems:
- AMD64-based systems can run both 32-bit versions of Windows and any 32-bit application that is supported by x86-based systems.
- 32-bit versions of Windows on AMD64 cannot execute 64-bit code. Running 64-bit code requires a 64-bit operating system.
- AMD64 processors cannot run Microsoft Windows XP 64-Bit Edition for Intel Itanium processors. The differences in architecture between the two processors prevent each from running Windows XP compiled for the other one.

Microsoft Windows Malicious Software Removal Tool
This post provide furthur information about Microsoft Windows Support. It contain the information about Microsoft malicious Software removal tools.
This tool checks your computer for infection by specific, prevalent malicious software (including Blaster, Sasser, and Mydoom) and helps to remove the infection if it is found. Microsoft will release an updated version of this tool on the second Tuesday of each month.
The Microsoft Windows Malicious Software Removal Tool checks Windows Vista, Windows XP, Windows 2000, and Windows Server 2003 computers for and helps remove infections by specific, prevalent malicious software—including Blaster, Sasser, and Mydoom. When the detection and removal process is complete, the tool displays a report describing the outcome, including which, if any, malicious software was detected and removed. The tool creates a log file named mrt.log in the %WINDIR%\debug folder.
Note that x64 version of this tool will only run on Vista x64, Windows XP x64 and Windows 2003 x64 computers.
This tool is not a replacement for an anti-virus support product. To help protect your computer, you should use an anti-virus product.
Microsoft will release an updated version of this tool on the second Tuesday of each month. New versions will be made available through this web page, Windows Update, and the Malicious Software Removal Tool Web site on Microsoft.com.
To have the newest versions automatically delivered and installed as soon as they are released, set the Automatic Updates feature to Automatic. The version of this tool delivered by Windows Update runs on your computer once a month, in the background. If an infection is found, the tool will display a status report the next time you start your computer. If you would like to run this tool more than once a month, run the version that is available from this Web page or use the version on the Malicious Software Removal Tool Support Web site.
This tool checks your computer for infection by specific, prevalent malicious software (including Blaster, Sasser, and Mydoom) and helps to remove the infection if it is found. Microsoft will release an updated version of this tool on the second Tuesday of each month.
The Microsoft Windows Malicious Software Removal Tool checks Windows Vista, Windows XP, Windows 2000, and Windows Server 2003 computers for and helps remove infections by specific, prevalent malicious software—including Blaster, Sasser, and Mydoom. When the detection and removal process is complete, the tool displays a report describing the outcome, including which, if any, malicious software was detected and removed. The tool creates a log file named mrt.log in the %WINDIR%\debug folder.
Note that x64 version of this tool will only run on Vista x64, Windows XP x64 and Windows 2003 x64 computers.
This tool is not a replacement for an anti-virus support product. To help protect your computer, you should use an anti-virus product.
Microsoft will release an updated version of this tool on the second Tuesday of each month. New versions will be made available through this web page, Windows Update, and the Malicious Software Removal Tool Web site on Microsoft.com.
To have the newest versions automatically delivered and installed as soon as they are released, set the Automatic Updates feature to Automatic. The version of this tool delivered by Windows Update runs on your computer once a month, in the background. If an infection is found, the tool will display a status report the next time you start your computer. If you would like to run this tool more than once a month, run the version that is available from this Web page or use the version on the Malicious Software Removal Tool Support Web site.
Troubleshooting Device Conflicts with Device Manager
This post lists steps you can use to troubleshoot hardware configuration troubles by using Device Manager. You can use Device Manager to examine and change software-configurable devices. Note that if your hardware device uses jumper pins or dip switches, you must configure the device manually.
How to start Device Manager:
1. Click Start, point to Settings, and then click Control Panel.
2. Double-click System, and then click the Device Manager tab.
Troubleshooting Information
• If there is a problem with a device, it is listed in the hardware tree under Computer. Also, the problem device has a symbol that indicates the type of problem:
o A black exclamation point (!) on a yellow field indicates the device is in a problem state. Note that a device that is in a problem state can be functioning.
o A problem code explaining the problem is displayed for the device.
o A red "X" indicates a disabled device. A disabled device is a device that is physically present in the computer and is consuming resources, but does not have a protected-mode driver loaded.
o A blue "i" on a white field on a device resource in Computer properties indicates that the Use Automatic Settings feature is not selected for the device and that the resource was manually selected. Note that this does not indicate a problem or disabled state.
o A green question mark "?" in Device Manager means that a compatible driver for this device is installed, indicating the possibility that all of the functionality may not be available. Note that this applies only to Windows Millennium Edition (Me).
NOTE: Some sound cards and video adapters do not report all of the resources they are using to Windows. This can cause Device Manager to show only one device in conflict, or no conflicts at all. This can be verified by disabling the sound card, or by using the standard VGA video driver to see if the conflict is resolved. Note that this is a known problem with S3 video adapters and 16-bit Sound Blaster sound cards, or those sound cards that are using Sound Blaster emulation for Sound Blaster compatibility.
• When you select a specific device in Device Manager and then click the Properties button, you see a property sheet. The property sheet has a General tab.
NOTE: Some devices may have other tabs besides the General tab. Not all property sheets have the same tabs; some devices may have a Resource tab, Driver tab, and Settings tab, or some combination of these.
At the top of the property sheet, there is a description of the device. When you click the Resource tab, the window in the middle of the tab indicates which resource types are available for the selected device.
The list box at the bottom contains a Conflicting Device list. This list indicates a conflict with an error code.
• Note the Use Automatic Settings check box. If Windows successfully detects a device, this check box is selected, and the device should function correctly. However, if the resource settings are based on Basic Configuration (where is any number from 0 to 9), it may be necessary to change the configuration by selecting a different basic configuration from the list. If the particular configuration you want for the device is not listed as a basic configuration, it may be possible to click the Change Settings button to manually adjust the resource values.
For example, to edit the Input/output Range setting:
1. Click the Use Automatic Settings check box to clear it.
2. Click Change Setting.
3. Click the appropriate I/O range for the device.
Notes
• If you click My Computer and then click Properties, you see a property sheet with a View Resources and a Reserve Resources tab.
The Reserve Resources tab excludes a resource from use by Windows.
The View Resources tab displays the resources that are allocated by Windows or inherited from a Plug and Play BIOS or PCI bus computer.
• To disable a device in Device Manager, in Properties, on the General tab, clear to select the Disable in this hardware profile check box.
Search Available also:
Explanation of Error Codes Generated by Device Manager
Add or Remove a Windows Component in Windows XP
Computer Help Canada
How to fix UNMOUNTABLE_BOOT_VOLUME
Computer Help and Support Srvices
How to start Device Manager:
1. Click Start, point to Settings, and then click Control Panel.
2. Double-click System, and then click the Device Manager tab.
Troubleshooting Information
• If there is a problem with a device, it is listed in the hardware tree under Computer. Also, the problem device has a symbol that indicates the type of problem:
o A black exclamation point (!) on a yellow field indicates the device is in a problem state. Note that a device that is in a problem state can be functioning.
o A problem code explaining the problem is displayed for the device.
o A red "X" indicates a disabled device. A disabled device is a device that is physically present in the computer and is consuming resources, but does not have a protected-mode driver loaded.
o A blue "i" on a white field on a device resource in Computer properties indicates that the Use Automatic Settings feature is not selected for the device and that the resource was manually selected. Note that this does not indicate a problem or disabled state.
o A green question mark "?" in Device Manager means that a compatible driver for this device is installed, indicating the possibility that all of the functionality may not be available. Note that this applies only to Windows Millennium Edition (Me).
NOTE: Some sound cards and video adapters do not report all of the resources they are using to Windows. This can cause Device Manager to show only one device in conflict, or no conflicts at all. This can be verified by disabling the sound card, or by using the standard VGA video driver to see if the conflict is resolved. Note that this is a known problem with S3 video adapters and 16-bit Sound Blaster sound cards, or those sound cards that are using Sound Blaster emulation for Sound Blaster compatibility.
• When you select a specific device in Device Manager and then click the Properties button, you see a property sheet. The property sheet has a General tab.
NOTE: Some devices may have other tabs besides the General tab. Not all property sheets have the same tabs; some devices may have a Resource tab, Driver tab, and Settings tab, or some combination of these.
At the top of the property sheet, there is a description of the device. When you click the Resource tab, the window in the middle of the tab indicates which resource types are available for the selected device.
The list box at the bottom contains a Conflicting Device list. This list indicates a conflict with an error code.
• Note the Use Automatic Settings check box. If Windows successfully detects a device, this check box is selected, and the device should function correctly. However, if the resource settings are based on Basic Configuration
For example, to edit the Input/output Range setting:
1. Click the Use Automatic Settings check box to clear it.
2. Click Change Setting.
3. Click the appropriate I/O range for the device.
Notes
• If you click My Computer and then click Properties, you see a property sheet with a View Resources and a Reserve Resources tab.
The Reserve Resources tab excludes a resource from use by Windows.
The View Resources tab displays the resources that are allocated by Windows or inherited from a Plug and Play BIOS or PCI bus computer.
• To disable a device in Device Manager, in Properties, on the General tab, clear to select the Disable in this hardware profile check box.
Search Available also:
Explanation of Error Codes Generated by Device Manager
Add or Remove a Windows Component in Windows XP
Computer Help Canada
How to fix UNMOUNTABLE_BOOT_VOLUME
Computer Help and Support Srvices
Users keep Microsoft Windows XP alive
Last year Microsoft announced that they would be pulling the plug on Windows XP, users frustrated many who were not big fans of the Windows Vista operating system. However, since this story to many people still using Windows XP on PCs and laptops allowing downgrade rights to Windows Vista.
With the release of Windows 7 scheduled Oct. 22, perhaps this is the end for Windows XP, unlike Windows Vista requirements 7 is not particularly good hardware necessary to install and run the operating system as well.
From the July 21 order OEM downgrade rights, it seems that ending the life of Windows XP, the only way you can get a license of XP will be the purchase from a supplier who still has a balance of it, demand XP license retailers will probably have to sell.
Microsoft is said to still offer XP for Netbooks, this is because some Netbooks hardware will not run any more advanced operating systems sufficiently.
With the release of Windows 7 scheduled Oct. 22, perhaps this is the end for Windows XP, unlike Windows Vista requirements 7 is not particularly good hardware necessary to install and run the operating system as well.
From the July 21 order OEM downgrade rights, it seems that ending the life of Windows XP, the only way you can get a license of XP will be the purchase from a supplier who still has a balance of it, demand XP license retailers will probably have to sell.
Microsoft is said to still offer XP for Netbooks, this is because some Netbooks hardware will not run any more advanced operating systems sufficiently.
Users keep Microsoft Windows XP alive
Last year Microsoft announced that they would be pulling the plug on Windows XP, users frustrated many who were not big fans of the Windows Vista operating system. However, since this story to many people still using Windows XP on PCs and laptops allowing downgrade rights to Windows Vista.
With the release of Windows 7 scheduled Oct. 22, perhaps this is the end for Windows XP, unlike Windows Vista requirements 7 is not particularly good hardware necessary to install and run the operating system as well.
From the July 21 order OEM downgrade rights, it seems that ending the life of Windows XP, the only way you can get a license of XP will be the purchase from a supplier who still has a balance of it, demand XP license retailers will probably have to sell.
Microsoft is said to still offer XP for Netbooks, this is because some Netbooks hardware will not run any more advanced operating systems sufficiently.
With the release of Windows 7 scheduled Oct. 22, perhaps this is the end for Windows XP, unlike Windows Vista requirements 7 is not particularly good hardware necessary to install and run the operating system as well.
From the July 21 order OEM downgrade rights, it seems that ending the life of Windows XP, the only way you can get a license of XP will be the purchase from a supplier who still has a balance of it, demand XP license retailers will probably have to sell.
Microsoft is said to still offer XP for Netbooks, this is because some Netbooks hardware will not run any more advanced operating systems sufficiently.
How to Conserve Battery Power in Windows XP
This post provide some tips to Conserve Battery Power of your laptop if you are using Windows XP. This Windows XP support tips help you to conserving Battery Power.
Is your battery powering your Windows XP laptop requiring a recharge almost constantly? Here are some things you can do to cause Windows XP to use less power:
1. First, check your battery to make sure it is completely holding its charge. This normally can be done by first completely charging your battery, turning your computer completely off, unhooking the battery, then performing a test on the battery by pressing a button or looking at a small display as per your computer manufacturer's instructions.
2. Stay offline when necessary. Network communications may put a drain on battery power.
3. Unhook USB devices whenever not in use - they can zap power.
4. Disable all background processes that you don't need, such as the clock or a background disk defragmenter. DO NOT disable firewalls or antivirus software as removing these programs can cause a security risk!
5. Change the screensaver to the "Blank Screen" screensaver. There's no need wasting power displaying fireworks or marquee text when your computer isn't doing anything important.
6. Though you shouldn't disable your antivirus software, don't schedule complete system scans until your computer is plugged in. Same for spyware scans.
7. Most importantly, when your computer is not in use, either shut it down, put it in standby, or hibernate it.
Is your battery powering your Windows XP laptop requiring a recharge almost constantly? Here are some things you can do to cause Windows XP to use less power:
1. First, check your battery to make sure it is completely holding its charge. This normally can be done by first completely charging your battery, turning your computer completely off, unhooking the battery, then performing a test on the battery by pressing a button or looking at a small display as per your computer manufacturer's instructions.
2. Stay offline when necessary. Network communications may put a drain on battery power.
3. Unhook USB devices whenever not in use - they can zap power.
4. Disable all background processes that you don't need, such as the clock or a background disk defragmenter. DO NOT disable firewalls or antivirus software as removing these programs can cause a security risk!
5. Change the screensaver to the "Blank Screen" screensaver. There's no need wasting power displaying fireworks or marquee text when your computer isn't doing anything important.
6. Though you shouldn't disable your antivirus software, don't schedule complete system scans until your computer is plugged in. Same for spyware scans.
7. Most importantly, when your computer is not in use, either shut it down, put it in standby, or hibernate it.
Microsoft Rolls Out Web Platform Installer 1.0
Microsoft announced the release of Web Platform Installer (Web PI) 1.0, a free downloadable tool designed to help install the Microsoft Web Platform or its components.
The whole platform can be installed to support Web application development. Alternatively, users can opt for specific Microsoft products, such as IIS, Visual Web Developer 2008 Express Edition, SQL Server 2008 Express Edition, .NET Framework and others, according to Microsoft's announcement.
This latest version of Web PI has been in beta since late November and has been inching its way from Release Candidate stage to its current 1.0 Release-to-Web status. Earlier issues, such as lack of support for Windows XP and Windows 2003, have been overcome. It also allows the installation of ASP.NET MVC and Visual Studio Tools.
Some users of the earlier beta requested an "uninstaller" for Web PI, according to a Microsoft forum, although it's unclear if Version 1.0 addresses that complaint.
Web PI runs on Windows Vista Service Pack 1 and Windows XP operating systems, as well as Windows Server 2003 and Windows Server 2008. It requires the .NET 2.0 Framework to install and supports both x86 and 64-bit architectures.
Web PI can be downloaded here, and Microsoft provides video instructions to ease matters.
Installation Steps
Install Web PI in 3 easy steps:
1. Click on the "install now" button on this page to install and launch the Web Platform Installer.
2. Choose the profile that meets your needs or choose "Your Choice" for full control on you what you install.
3. Confirm and watch while Web PI downloads and installs what you need.
In other Web dev news, Microsoft has noted a problem with some Web development apps closing slowly in Visual Studio and Visual Web Developer Express, especially when those projects are located on remote servers.
More Related Search
Microsoft Support
Operating System Support
The whole platform can be installed to support Web application development. Alternatively, users can opt for specific Microsoft products, such as IIS, Visual Web Developer 2008 Express Edition, SQL Server 2008 Express Edition, .NET Framework and others, according to Microsoft's announcement.
This latest version of Web PI has been in beta since late November and has been inching its way from Release Candidate stage to its current 1.0 Release-to-Web status. Earlier issues, such as lack of support for Windows XP and Windows 2003, have been overcome. It also allows the installation of ASP.NET MVC and Visual Studio Tools.
Some users of the earlier beta requested an "uninstaller" for Web PI, according to a Microsoft forum, although it's unclear if Version 1.0 addresses that complaint.
Web PI runs on Windows Vista Service Pack 1 and Windows XP operating systems, as well as Windows Server 2003 and Windows Server 2008. It requires the .NET 2.0 Framework to install and supports both x86 and 64-bit architectures.
Web PI can be downloaded here, and Microsoft provides video instructions to ease matters.
Installation Steps
Install Web PI in 3 easy steps:
1. Click on the "install now" button on this page to install and launch the Web Platform Installer.
2. Choose the profile that meets your needs or choose "Your Choice" for full control on you what you install.
3. Confirm and watch while Web PI downloads and installs what you need.
In other Web dev news, Microsoft has noted a problem with some Web development apps closing slowly in Visual Studio and Visual Web Developer Express, especially when those projects are located on remote servers.
More Related Search
Microsoft Support
Operating System Support
How to check for Windows updates?
To enhance your computer security and to offer a better computing experience, Microsoft offers updates and patches in regular interval. The users must install those updates regularly. Go through the article and learn how to check for Windows Updates. Remember, you must have administrator permission to install update.
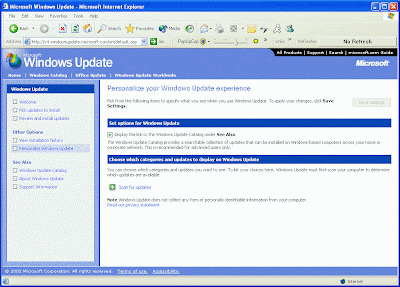
1. Click the Start button and in the search box, type Update, then click Windows Update.
2. You will find Check for updates in the left pane, click on it and let Windows look for the latest updates for your PC.
3. You will get a message if any important updates are available. The message may also tell you to review important updates. Click the message and choose the important updates to install.
4. Click Install updates.
5. Next, you need to read and accept the license terms, and then click Finish.
6. If you are asked for an administrator password, type the password.
7. There are some updates that require restarting windows after finishing installation.
If you find any problem, you can consult a Technical Support service provider for getting Windows Support. You can also dial 1.866.515.9918 to talk to a Microsoft certified expert.
1. Click the Start button and in the search box, type Update, then click Windows Update.
2. You will find Check for updates in the left pane, click on it and let Windows look for the latest updates for your PC.
3. You will get a message if any important updates are available. The message may also tell you to review important updates. Click the message and choose the important updates to install.
4. Click Install updates.
5. Next, you need to read and accept the license terms, and then click Finish.
6. If you are asked for an administrator password, type the password.
7. There are some updates that require restarting windows after finishing installation.
If you find any problem, you can consult a Technical Support service provider for getting Windows Support. You can also dial 1.866.515.9918 to talk to a Microsoft certified expert.
Fix 16-bit MS-DOS Subsystem Error Massage
This addition you get further information to troubleshoot error "16-bit MS-DOS Subsystem" error message when you run an MS-DOS or 16-Bit Windows program in Windows Server 2003 or Windows 2000 Server"
If you try to run an MS-DOS-based or a 16-bit Windows-based command on a Microsoft Windows Server 2003-based or a Microsoft Windows 2000 Server-based computer, you may receive one of the following error messages:
16-bit MS-DOS Subsystem
path to the program you are trying to start or install
C:\WINNT\system32\config.nt The system file is not suitable for running MS-DOS and Microsoft Windows applications. Choose 'Close' to terminate the application.
16-bit MS-DOS Subsystem
path to the program you are trying to run
config.nt The system file is not suitable for running MS-DOS and Microsoft Windows applications. Choose 'Close' to terminate the application.
16-bit MS-DOS Subsystem
path to the program you are trying to run
C:\WINNT\system32\autoexec.nt The system file is not suitable for running MS-DOS and Microsoft Windows applications. Choose 'Close' to terminate the application.
This issue can occur if any one of the following files are missing, damaged, or not located in the %systemroot%\System32 folder:
Autoexec.nt
Command.com
Config.nt
This post provide step by step Computer repair and troubleshooting tips to fix this issue
Follow the Steps
1. Insert the Windows Server 2003 CD or the Windows 2000 Server CD into the CD drive.
2. Click Start, click Run, type cmd, and then click OK.
3. Type the following commands, and press ENTER after each command:
expand D:\i386\config.nt_ %systemroot%\system32\config.nt
expand D:\i386\autoexec.nt_ %systemroot%\system32\autoexec.nt
expand D:\i386\command.co_ %systemroot%\system32\command.com
exit
Note The description of this procedure assumes that your CD drive letter is D. If your CD drive letter is not D, substitute the correct drive letter.
4. Start or install the program. If the issue is resolved, do not complete the remaining steps. If the issue is not resolved, go to the next step.
5. Start Notepad, and then type the following commands.
Note The Command.com file is not edited or created in the following process. Because of this, you may have to expand the file from your CD-ROM. See step 16 for instructions on how to do this.
dos=high, umb
device=%SYSTEMROOT%\system32\himem.sys
files=40
6. On the File menu, click Save As.
7. In the File Name box, type Config.nt, and then click Save. Close the Config.nt file.
8. On the File menu, click New.
9. In the new blank document, type the following entries.
@echo off
lh %SYSTEMROOT%\system32\mscdexnt.exe
lh %SYSTEMROOT%\system32\redir
lh %SYSTEMROOT%\system32\dosx
SET BLASTER=A220 I5 D1 P330 T3
10. On the File menu, click Save As.
11. In the File Name box, type Autoexec.nt, and then click Save. Close the Autoexec.nt file.
12. Start Windows Explorer. Locate the Config.nt file, right-click the Config.nt file, and then click Copy.
13. Right-click the %systemroot%\System32 folder, and then click Paste.
14. Locate the Autoexec.nt file, right-click the Autoexec.nt file, and then click Copy.
15. Right-click the %systemroot%\System32 folder, and then click Paste.
16. Expand the Command.com file from the Windows Server 2003 or the Windows 2000 Server CD-ROM. To do this, follow these steps:
1. Click Start, click Run, type cmd, and then click OK.
2.
expand cd-rom:\i386\command.co_ drive_letter:\system_root\system32\command.com
exit
17. Verify the existence of the folder to which the TEMP and TMP user environment variables are mapped. To do this, follow these steps:
1. Click Start, click Run, type sysdm.cpl in the Open box, and then click OK.
2. In the System Properties dialog box, click the Advanced tab, and then click Environment Variables.
3. In the User variables for UserName section, locate the TEMP and TMP variables. They are listed in the Variable column.
4. For the TEMP and TMP variables, note the corresponding folder that is listed in the Value column.
5. Start Windows Explorer. To do this, click Start, click Run, type explorer in the Open box, and then click OK.
6. Locate the folder that is specified for the TEMP and TMP variables. Make sure that this folder exists.
Note To locate the folder, you may have to turn on the feature that shows hidden files and folders. To do this, follow these steps:
1. On the Tools menu, click Folder Options, and then click the View tab.
2. Under Hidden files and folders, click Show hidden files and folders, and then click OK.
18. Restart your computer.
If you try to run an MS-DOS-based or a 16-bit Windows-based command on a Microsoft Windows Server 2003-based or a Microsoft Windows 2000 Server-based computer, you may receive one of the following error messages:
16-bit MS-DOS Subsystem
path to the program you are trying to start or install
C:\WINNT\system32\config.nt The system file is not suitable for running MS-DOS and Microsoft Windows applications. Choose 'Close' to terminate the application.
16-bit MS-DOS Subsystem
path to the program you are trying to run
config.nt The system file is not suitable for running MS-DOS and Microsoft Windows applications. Choose 'Close' to terminate the application.
16-bit MS-DOS Subsystem
path to the program you are trying to run
C:\WINNT\system32\autoexec.nt The system file is not suitable for running MS-DOS and Microsoft Windows applications. Choose 'Close' to terminate the application.
This issue can occur if any one of the following files are missing, damaged, or not located in the %systemroot%\System32 folder:
Autoexec.nt
Command.com
Config.nt
This post provide step by step Computer repair and troubleshooting tips to fix this issue
Follow the Steps
1. Insert the Windows Server 2003 CD or the Windows 2000 Server CD into the CD drive.
2. Click Start, click Run, type cmd, and then click OK.
3. Type the following commands, and press ENTER after each command:
expand D:\i386\config.nt_ %systemroot%\system32\config.nt
expand D:\i386\autoexec.nt_ %systemroot%\system32\autoexec.nt
expand D:\i386\command.co_ %systemroot%\system32\command.com
exit
Note The description of this procedure assumes that your CD drive letter is D. If your CD drive letter is not D, substitute the correct drive letter.
4. Start or install the program. If the issue is resolved, do not complete the remaining steps. If the issue is not resolved, go to the next step.
5. Start Notepad, and then type the following commands.
Note The Command.com file is not edited or created in the following process. Because of this, you may have to expand the file from your CD-ROM. See step 16 for instructions on how to do this.
dos=high, umb
device=%SYSTEMROOT%\system32\himem.sys
files=40
6. On the File menu, click Save As.
7. In the File Name box, type Config.nt, and then click Save. Close the Config.nt file.
8. On the File menu, click New.
9. In the new blank document, type the following entries.
@echo off
lh %SYSTEMROOT%\system32\mscdexnt.exe
lh %SYSTEMROOT%\system32\redir
lh %SYSTEMROOT%\system32\dosx
SET BLASTER=A220 I5 D1 P330 T3
10. On the File menu, click Save As.
11. In the File Name box, type Autoexec.nt, and then click Save. Close the Autoexec.nt file.
12. Start Windows Explorer. Locate the Config.nt file, right-click the Config.nt file, and then click Copy.
13. Right-click the %systemroot%\System32 folder, and then click Paste.
14. Locate the Autoexec.nt file, right-click the Autoexec.nt file, and then click Copy.
15. Right-click the %systemroot%\System32 folder, and then click Paste.
16. Expand the Command.com file from the Windows Server 2003 or the Windows 2000 Server CD-ROM. To do this, follow these steps:
1. Click Start, click Run, type cmd, and then click OK.
2.
expand cd-rom:\i386\command.co_ drive_letter:\system_root\system32\command.com
exit
17. Verify the existence of the folder to which the TEMP and TMP user environment variables are mapped. To do this, follow these steps:
1. Click Start, click Run, type sysdm.cpl in the Open box, and then click OK.
2. In the System Properties dialog box, click the Advanced tab, and then click Environment Variables.
3. In the User variables for UserName section, locate the TEMP and TMP variables. They are listed in the Variable column.
4. For the TEMP and TMP variables, note the corresponding folder that is listed in the Value column.
5. Start Windows Explorer. To do this, click Start, click Run, type explorer in the Open box, and then click OK.
6. Locate the folder that is specified for the TEMP and TMP variables. Make sure that this folder exists.
Note To locate the folder, you may have to turn on the feature that shows hidden files and folders. To do this, follow these steps:
1. On the Tools menu, click Folder Options, and then click the View tab.
2. Under Hidden files and folders, click Show hidden files and folders, and then click OK.
18. Restart your computer.
How to fix error messages when you install, upgrade, or use an application
In this post you can get technical support for solve the issue When you install, upgrade, or use an application, you may receive various error messages that indicate that access was denied. For example, you may experience one of the following symptoms:
* After you install an application in a folder other than the %programfiles% folder, you receive "access denied" error messages. Additionally, the application does not function as expected.
* You receive application error messages that resemble the following:
Cannot create folder under C:\MyApp\Temp
Cannot create file under C:\MyApp\Temp\output.dat
* You receive error messages that resemble the following:
Error Writing to MyFile.exe
This issue may occur when you perform any of the following actions:
To resolve his issue use the following steps given below.
1. Click Start button
, type eventvwr in the Start Search box, and then click eventvwr.exe in the Programs list.
User Account Control permission
If you are prompted for an administrator password or for confirmation, type your password, or click Continue.
2. Expand Applications and Services Logs, expand Microsoft, expand Windows, expand UacFileVirtualization, and then select Operational. If the event ID is 5000, a FileCreateVirtualExclude event has occurred.
To resolve this issue, use one of the following methods:
* Reinstall the application in the %programfiles% folder if the program is not already installed in the %programfiles% folder.
* Use an account that has administrative credentials to run this application. To do this, locate and then right-click the application shortcut, and then click Run as administrator.
User Account Control permission
If you are prompted for an administrator password or for confirmation, type your password, or click Continue.
* Run the application at an elevated command prompt. To do this, follow these steps:
1. Click Start
Start button
, and then type cmd in the Start Search box, and then click cmd.exe in the Programs list.
2. In the Programs list, right-click cmd, and then click Run as administrator.
User Account Control permission
If you are prompted for an administrator password or for confirmation, type your password, or click Continue.
3. Type MyAppsPath/MyApp, and then press ENTER. MyAppsPath/MyApp represents the path and the name of the application.
* Change the security settings on the application's folder. To do this, follow these steps:
1. Log on as a user who has administrative credentials, and then use Windows Explorer to open the application's folder.
2. Right-click the application's folder, and then click Properties.
3. On the Security tab, click Edit.
User Account Control permission
If you are prompted for an administrator password or for confirmation, type your password, or click Continue.
4. Under Group or user names, click your user account.
5. Under Permissions for Users, click Allow for the following permissions:
More related topic:
computer support services
computer repair services
0x80070005 - Access is denied
* After you install an application in a folder other than the %programfiles% folder, you receive "access denied" error messages. Additionally, the application does not function as expected.
* You receive application error messages that resemble the following:
Cannot create folder under C:\MyApp\Temp
Cannot create file under C:\MyApp\Temp\output.dat
* You receive error messages that resemble the following:
Error Writing to MyFile.exe
This issue may occur when you perform any of the following actions:
- You create links in virtualized locations.
- You use the Encrypting File System (EFS) to encrypt files.
- You try to view compressed files.
- You use the command prompt to copy an .exe, .sys, or .dll file into a virtualizable location.
To resolve his issue use the following steps given below.
1. Click Start button
, type eventvwr in the Start Search box, and then click eventvwr.exe in the Programs list.
User Account Control permission
If you are prompted for an administrator password or for confirmation, type your password, or click Continue.
2. Expand Applications and Services Logs, expand Microsoft, expand Windows, expand UacFileVirtualization, and then select Operational. If the event ID is 5000, a FileCreateVirtualExclude event has occurred.
To resolve this issue, use one of the following methods:
* Reinstall the application in the %programfiles% folder if the program is not already installed in the %programfiles% folder.
* Use an account that has administrative credentials to run this application. To do this, locate and then right-click the application shortcut, and then click Run as administrator.
User Account Control permission
If you are prompted for an administrator password or for confirmation, type your password, or click Continue.
* Run the application at an elevated command prompt. To do this, follow these steps:
1. Click Start
Start button
, and then type cmd in the Start Search box, and then click cmd.exe in the Programs list.
2. In the Programs list, right-click cmd, and then click Run as administrator.
User Account Control permission
If you are prompted for an administrator password or for confirmation, type your password, or click Continue.
3. Type MyAppsPath/MyApp, and then press ENTER. MyAppsPath/MyApp represents the path and the name of the application.
* Change the security settings on the application's folder. To do this, follow these steps:
1. Log on as a user who has administrative credentials, and then use Windows Explorer to open the application's folder.
2. Right-click the application's folder, and then click Properties.
3. On the Security tab, click Edit.
User Account Control permission
If you are prompted for an administrator password or for confirmation, type your password, or click Continue.
4. Under Group or user names, click your user account.
5. Under Permissions for Users, click Allow for the following permissions:
- Modify
- Read & Execute
- List Folder Contents
- Read
- Write
More related topic:
computer support services
computer repair services
0x80070005 - Access is denied
Rasdiag.exe Support Tool in Windows XP
This post descrive how to use Rasdiag.exe Support Tool in Windows XP.The Remote Access Service Diagnostics Tool (Rasdiag.exe) collects diagnostic information about remote support services and places that information in a file. Administrators can use this tool to work with Microsoft Product Support Services to troubleshoot remote connection issues by taking a snapshot of the configuration data and capturing an attempted remote connection.
To start Rasdiag, click Start, click Run, type cmd, and then press ENTER. At the command prompt, type rasdiag.exe, and then press ENTER. Rasdiag.exe uses the following command-line switches.
Collapse this tableExpand this table
Parameter-------------------Description
-r (ipaddr)-------------------Enable remote sniff.
-t ---------------------------Enable remote routing table collection (requires -r).
(Filename.rdg)--------------Extract Rasdiag file (for example: rasdiag.exe sample.rdg).
/?---------------------------Display Help.
-?---------------------------Display Help.
When you run Rasdiag, you see the following information:
Preparing WindowsXP for RAS diagnostics.
--------------------------------------------------------------------------------
RASDIAG - RAS Diagnostic/Troubleshooting Tool
--------------------------------------------------------------------------------
INSTRUCTIONS
1) At this time, please reproduce the problem you are seeing.
2) Once the problem has been reproduced, please return to this console
and press the space bar.
3) Wait for diagnostics and data collection process to complete. This
process will be complete the RASDIAG folder has opened on your
desktop. In this folder, you will find an .RDG file.
4) Please provide this .RDG file to your support contact.
NOTE: The netmon driver is actively capturing on this machine's
WAN and LAN interfaces. If you are able to successfully make a
connection, and the problem you are seeing is related to network-layer
connectivity, please perform the data-related action at this time
--------------------------------------------------------------------------------
STATUS: Waiting for you to REPRO and press the space bar in this console
After this is displayed, reproduce the issue you want to capture information about (for example, start a dial-up connection and log on to a server). After the action is completed, make the command prompt window the active window and press SPACEBAR. Pressing SPACEBAR causes Rasdiag to stop capturing information and write it to a compressed file with a .rdg extension. The name of the file is the date and time it was created. You can then send this file to your support contact.
This file contains a Network Monitor capture (.cap) and Rasdiag.txt file. To extract the files, type rasdiag filename.rdg. The contents of the compressed file are extracted in the same folder.
To start Rasdiag, click Start, click Run, type cmd, and then press ENTER. At the command prompt, type rasdiag.exe, and then press ENTER. Rasdiag.exe uses the following command-line switches.
Collapse this tableExpand this table
Parameter-------------------Description
-r (ipaddr)-------------------Enable remote sniff.
-t ---------------------------Enable remote routing table collection (requires -r).
(Filename.rdg)--------------Extract Rasdiag file (for example: rasdiag.exe sample.rdg).
/?---------------------------Display Help.
-?---------------------------Display Help.
When you run Rasdiag, you see the following information:
Preparing WindowsXP for RAS diagnostics.
--------------------------------------------------------------------------------
RASDIAG - RAS Diagnostic/Troubleshooting Tool
--------------------------------------------------------------------------------
INSTRUCTIONS
1) At this time, please reproduce the problem you are seeing.
2) Once the problem has been reproduced, please return to this console
and press the space bar.
3) Wait for diagnostics and data collection process to complete. This
process will be complete the RASDIAG folder has opened on your
desktop. In this folder, you will find an .RDG file.
4) Please provide this .RDG file to your support contact.
NOTE: The netmon driver is actively capturing on this machine's
WAN and LAN interfaces. If you are able to successfully make a
connection, and the problem you are seeing is related to network-layer
connectivity, please perform the data-related action at this time
--------------------------------------------------------------------------------
STATUS: Waiting for you to REPRO and press the space bar in this console
After this is displayed, reproduce the issue you want to capture information about (for example, start a dial-up connection and log on to a server). After the action is completed, make the command prompt window the active window and press SPACEBAR. Pressing SPACEBAR causes Rasdiag to stop capturing information and write it to a compressed file with a .rdg extension. The name of the file is the date and time it was created. You can then send this file to your support contact.
This file contains a Network Monitor capture (.cap) and Rasdiag.txt file. To extract the files, type rasdiag filename.rdg. The contents of the compressed file are extracted in the same folder.
Printer driver problem or printer settings problem
This section provide further information about When you try to print in the Access 2003 environment, you may receive a fatal system error or you may notice printing problems. If these problems occur, use the Generic/Text Only printer driver. To do this, follow these steps:
1. Click Start, point to Settings, and then click Control Panel.
2. In Control Panel, double-click Printers.
3. In Printers, double-click Add Printer.
Follow the instructions in the Add Printer Wizard to install the Generic/Text Only printer driver. Try to print from Access 2003 by using the Generic/Text Only printer driver.
Note If the printing problems exist for Generic/Text Only printer driver in addition to another printer driver, the problem is likely not printer-driver specific. However, if the printing problems are corrected by using a different printer driver, to reinstall the problem printer driver, follow these steps:
1. Click Start, point to Settings, and then click Control Panel.
2. In Control Panel, double-click Printers.
3. Right-click the printer that you want to remove, and then click Delete.
4. Click Yes if you are prompted to remove all the files that are associated with the printer.
5. Click Start, point to Settings, and then click Control Panel.
6. In Control Panel, double-click Printers.
7. In Printers, double-click Add Printer.
Follow the instructions in the Add Printer Wizard to install the original printer driver.
Note If you reinstall the printer driver and the reinstallation does not solve the printing problems, you can use a different printer driver or the Generic/Text Only printer driver again. You must also contact the printer-driver manufacturer to report the problem and to find out if an updated printer driver is available.
Related Search:
Fix XP Memory Dump File Error
How to Use Virtual Hard Disks as Real Hard Disks in Windows 7
Avail computer help 24x7
Fix Disk fragmentation or disk errors
Microsoft support Center
1. Click Start, point to Settings, and then click Control Panel.
2. In Control Panel, double-click Printers.
3. In Printers, double-click Add Printer.
Follow the instructions in the Add Printer Wizard to install the Generic/Text Only printer driver. Try to print from Access 2003 by using the Generic/Text Only printer driver.
Note If the printing problems exist for Generic/Text Only printer driver in addition to another printer driver, the problem is likely not printer-driver specific. However, if the printing problems are corrected by using a different printer driver, to reinstall the problem printer driver, follow these steps:
1. Click Start, point to Settings, and then click Control Panel.
2. In Control Panel, double-click Printers.
3. Right-click the printer that you want to remove, and then click Delete.
4. Click Yes if you are prompted to remove all the files that are associated with the printer.
5. Click Start, point to Settings, and then click Control Panel.
6. In Control Panel, double-click Printers.
7. In Printers, double-click Add Printer.
Follow the instructions in the Add Printer Wizard to install the original printer driver.
Note If you reinstall the printer driver and the reinstallation does not solve the printing problems, you can use a different printer driver or the Generic/Text Only printer driver again. You must also contact the printer-driver manufacturer to report the problem and to find out if an updated printer driver is available.
Related Search:
Fix XP Memory Dump File Error
How to Use Virtual Hard Disks as Real Hard Disks in Windows 7
Avail computer help 24x7
Fix Disk fragmentation or disk errors
Microsoft support Center
How to delete the Recovery Console
This post provide technical support for remove recovery console from your computer.
To delete the Recovery Console:
1. Restart your computer, click Start, click My Computer, and then double-click the hard disk where you installed the Recovery Console.
2. On the Tools menu, click Folder Options, and then click the View tab.
3. Click Show hidden files and folders, click to clear the Hide protected operating system files check box, and then click OK.
4. At the root folder, delete the Cmdcons folder and the Cmldr file.
5. At the root folder, right-click the Boot.ini file, and then click Properties.
6. Click to clear the Read-only check box, and then click OK.
Warning: Modifying the Boot.ini file incorrectly may prevent your computer from restarting. Make sure that you delete only the entry for the Recovery Console. Also, change the attribute for the Boot.ini file back to a read-only state after you finish this procedure. Open the Boot.ini file in Microsoft Windows Notepad, and remove the entry for the Recovery Console. It looks similar to this:
C:\cmdcons\bootsect.dat="Microsoft Windows Recovery Console" /cmdcons
7. Save the file and close it.
To delete the Recovery Console:
1. Restart your computer, click Start, click My Computer, and then double-click the hard disk where you installed the Recovery Console.
2. On the Tools menu, click Folder Options, and then click the View tab.
3. Click Show hidden files and folders, click to clear the Hide protected operating system files check box, and then click OK.
4. At the root folder, delete the Cmdcons folder and the Cmldr file.
5. At the root folder, right-click the Boot.ini file, and then click Properties.
6. Click to clear the Read-only check box, and then click OK.
Warning: Modifying the Boot.ini file incorrectly may prevent your computer from restarting. Make sure that you delete only the entry for the Recovery Console. Also, change the attribute for the Boot.ini file back to a read-only state after you finish this procedure. Open the Boot.ini file in Microsoft Windows Notepad, and remove the entry for the Recovery Console. It looks similar to this:
C:\cmdcons\bootsect.dat="Microsoft Windows Recovery Console" /cmdcons
7. Save the file and close it.
Subscribe to:
Posts (Atom)